
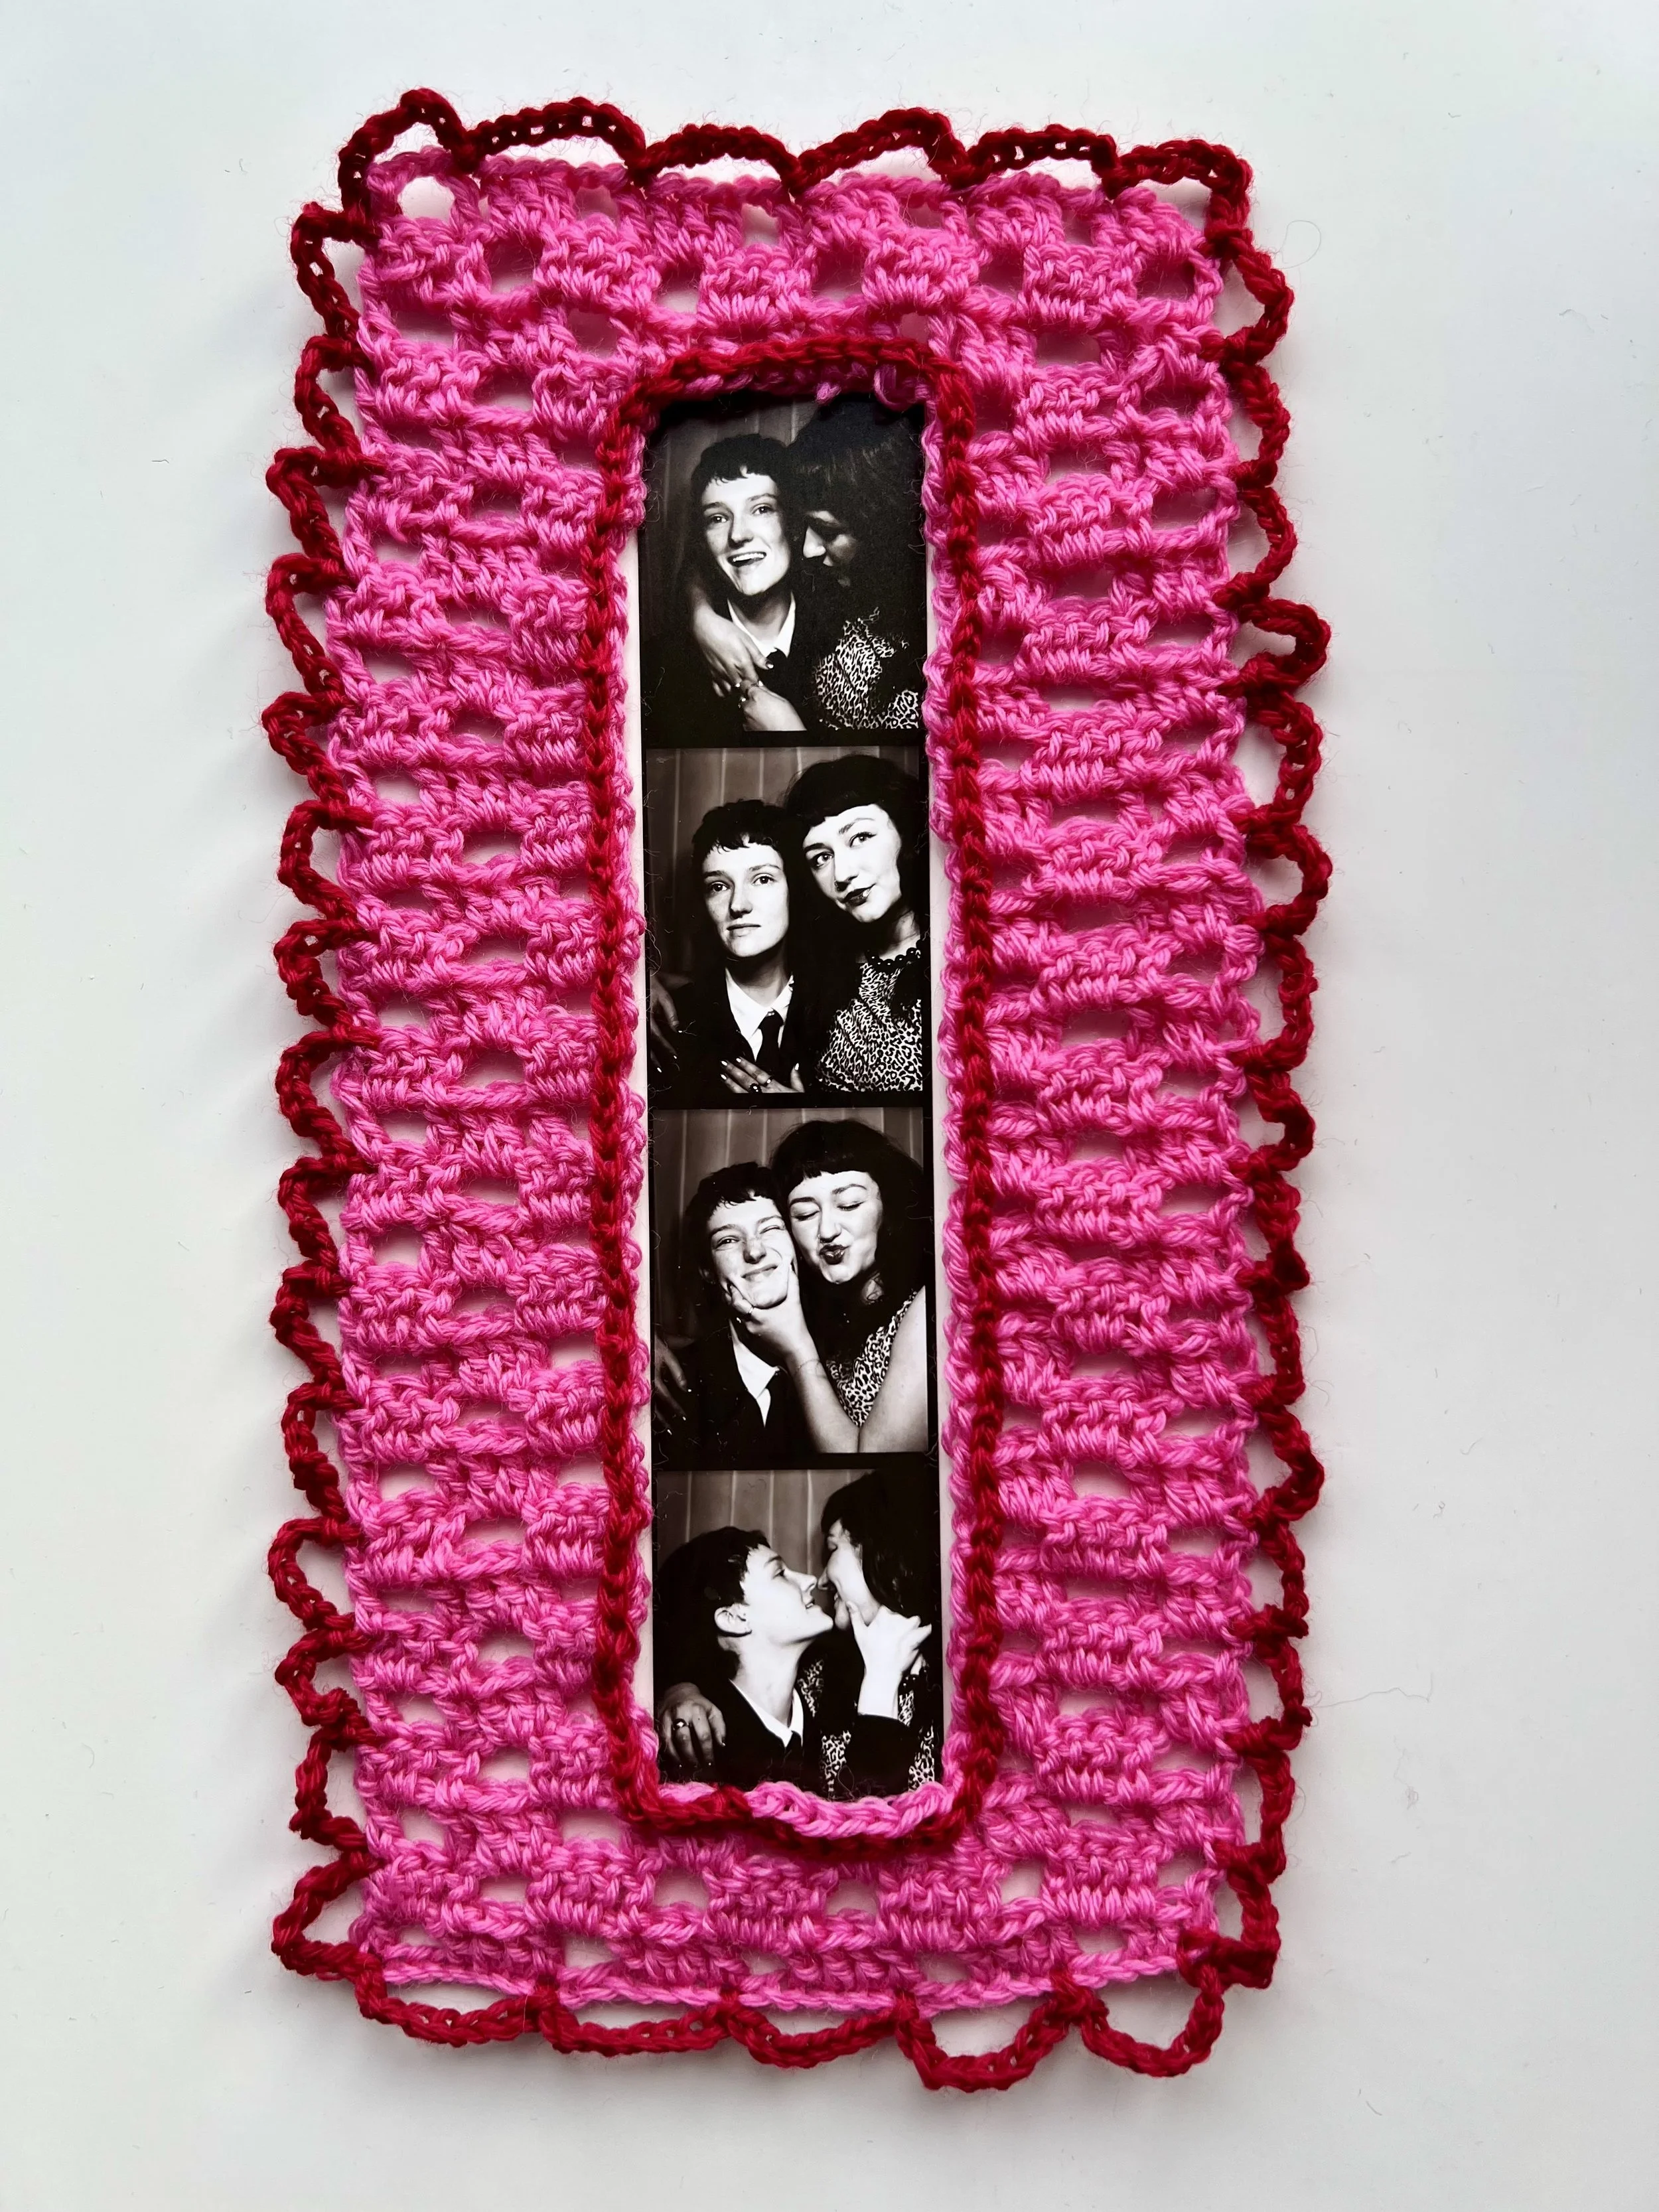
lovers photo frame
Pattern Details
All the best date nights end with a tipsy trip to a photobooth. Memorialize the good vibes by adding a crocheted frame and gifting it to your lover on your next night out <3
measurements
6.5 inches wide by 11.5 inches tall, with a 2 inch wide by 7.5 inches tall opening for a photo strip
materials
12 grams fingering weight yarn
3.25mm hook
gauge
28 stitches by 13 rows = 4x4 inches following the row 1 stitching pattern
copyright © 2026 Alexa Kari Designs. for personal use only. reader/purchaser may not copy, resell, or redistribute any part of the pattern without permission. reader/purchaser may not sell any garments created following the pattern.video tutorial
A complete tutorial for the Lovers Photo Frame is available on the Material Grrrlz YouTube channel:
Subscribe to get free patterns straight to your inbox:)
instructions
Chain (ch) 30 sts.
Row 1: Ch 2, double crochet (dc) 3, repeat (ch 2 and skip 2 chains, dc 4) across row, dc in last chain.
Repeat row 1 a further 2 times.
You will now work on the left side of the frame.
Row 4: Ch 2, dc 3, ch2 and skip 2 chains, dc 4.
Row 5: Ch 4 and skip the first 2 chains, dc 4, ch 2 and skip 2 chains, dc in last stitch.
Repeat rows 4 & 5 a further 11 times.
Row 28: Ch 2, dc 3, ch2 and skip 2 chains, dc 4.
Tie off.
You will now work on the right side of the frame. Attach yarn to the top right corner of the frame base.
Row 1: Ch 4 and skip the first 2 chains, dc 4, ch 2 and skip 2 chains, dc in last stitch.
Row 2: Ch 2, dc 3, ch2 and skip 2 chains, dc 4.
Repeat rows 1 & 2 a further 11 times.
Row 25: Ch 4 and skip the first 2 chains, dc 4, ch 2 and skip 2 chains, dc in last stitch.
Tie off.
You will now connect the two sides together to create the top of the frame.
Attach yarn to the top left corner of the right side of the frame. Ch 10, slip stitch and tie off in the top right corner of the left side of the frame.
Attach yarn to the top right corner of the frame.
Row 1: Ch 2, dc 3, ch2 and skip 2 chains, dc 4.
Repeat row 1 a further 2 times. Tie off.
You will now create borders on the inside and outside edges of the frame.
For the inside, slip stitch into each stitch/row around the opening.
For the outside, repeat (ch 8 and skip 2 rows, single crochet) around all edges.

This pattern was originally published in the Q1 2026 issue of Material Grrrlz
Download the whole issue for free here!
(featuring even more free patterns and girlie fiber art activities…)